Third Party Plugins
This section will cover every third party plugins. They are all styled nicely to work together with this template.
Each plugin explanation will contain a usage example that will provide you a the base markup along with the minimal required JavaScript and CSS file, where their file paths will follow this template's directory structure.
Totally, there are 20 great plugins shipped with this version of MoonCake. There will be more and more plugins added in the future, but for now let's go through each plugin and see what they are used for and how to use them,
CLEditor
CLEditor is a very simple, lightweight WYSIWYG editor that compared to other big, complex editors, is very easy to implement and use. This was the reason I choose this plugin as the WYSIWYG editor instead of other editors.
On the home page of CLEditor, it is stated that CLEditor is an open source jQuery plugin which provides a lightweight, full featured, cross browser, extensible, WYSIWYG HTML editor that can be easily added into any web site.
Usage Example
<link rel="stylesheet" href="plugins/cleditor/jquery.cleditor.css" media="screen">

<script src="assets/jui/js/jquery-ui-1.8.24.min.js"></script>
<script src="plugins/cleditor/jquery.cleditor.min.js"></script>
<script>
    $(document).ready(function() {
        if( $.fn.cleditor ) {
            $('#cleditor').cleditor({
                // CLEditor options
            });
        }
    });
</script>

<textarea id="cleditor"></textarea>
Home Page: http://premiumsoftware.net/cleditor/
Documentation: http://premiumsoftware.net/cleditor/docs/GettingStarted.html
Plugin Location: /plugins/cleditor
DataTables
DataTables is a plug-in for the jQuery Javascript library. It is a highly flexible tool, based upon the foundations of progressive enhancement, which will add advanced interaction controls to any HTML table.
For this plugin to work together with Bootstrap, you need to include an extension script for this plugin. This script is already included in this template, all you need is just to include it on your page to get it to work.
Usage Example
<script src="assets/jui/js/jquery-ui-1.8.24.min.js"></script>
<script src="plugins/datatables/jquery.dataTables.min.js"></script>
<!-- Bootstrap Extension Script -->
<script src="plugins/datatables/dataTables.bootstrap.js"></script>

<script>
    $(document).ready(function() {
        if( $.fn.dataTable ) {
            $('#dTable').dataTable();
        }
    });
</script>

<table id="dTable" class="table table-striped">
    <!-- Your Table Contents -->
</table>
Home Page: http://datatables.net/
Documentation: http://datatables.net/
Plugin Location: /plugins/datatables
elFinder
elFinder is an open-source file manager for web, written in JavaScript using jQuery UI. Creation is inspired by simplicity and convenience of Finder program used in Mac OS X operating system.
This plugin needs you to configure your backend PHP connector script, this PHP script is located in plugins/elfinder/php. Working with this PHP connector requires you to have some PHP and server side scripting knowledge. Connectors for other languages can be found in elFinder's home page.
To use this plugin, make sure you have included /assets/css/plugins/elfinder.css on your page.
Usage Example
<link rel="stylesheet" href="plugins/elfinder/css/elfinder.min.css" media="screen">

<script src="assets/jui/js/jquery-ui-1.8.24.min.js"></script>
<script src="plugins/elfinder/js/elfinder.min.js"></script>

<script>
    $(document).ready(function() {
        if( $.fn.elfinder ) {
            $('#elfinder').elfinder({
                // elFinder options
            });
        }
    });
</script>

<div id="elfinder"></div>
Home Page: http://elfinder.org/
Documentation: https://github.com/Studio-42/elFinder/wiki
Plugin Location: /plugins/elfinder
Farbtastic Color Picker
Farbtastic is a jQuery plug-in that can add one or more color picker widgets into a page. Each widget is then linked to an existing element (e.g. a text field) and will update the element's value when a color is selected.
Usage Example
<link rel="stylesheet" href="plugins/farbtastic/farbtastic.css" media="screen">

<script src="assets/jui/js/jquery-ui-1.8.24.min.js"></script>
<script src="plugins/farbtastic/farbtastic.min.js"></script>
<script>
    $(document).ready(function() {
        if( $.fn.farbtastic ) {
            $('#colorpicker').farbtastic('#color');
        }
    });
</script>

<form><input type="text" id="color" name="color" value="#123456" /></form>
<div id="colorpicker"></div>
Home Page: https://github.com/mattfarina/farbtastic
Documentation: https://github.com/mattfarina/farbtastic
Plugin Location: /plugins/farbtastic
Flot
Flot is a pure JavaScript plotting library for jQuery, with a focus on simple usage, attractive looks and interactive features.
Flot works with Internet Explorer 6+, Chrome, Firefox 2+, Safari 3+ and Opera 9.5+
Below is just a very simple example, you can actually create almost everything you need by using the provided plugins, or you can even create your own.
Generally, all browsers that support the HTML5 canvas tag are supported. For support for Internet Explorer < 9, you can use Excanvas, a canvas emulator. This canvas emulator is included on your page between IE conditional comments like on the example below.
Usage Example
<script src="assets/jui/js/jquery-ui-1.8.24.min.js"></script>
<!--[if lt IE 9]>
<script src="assets/js/libs/excanvas.min.js"></script>
<![endif]-->
<script src="plugins/flot/jquery.flot.js"></script>

<script>
    $(document).ready(function() {
        var options = {
            series: {
                lines: { show: true },
                points: { show: true }
            }
        };

        // Generate your data here

        $.plot($( '#placeholder' ), data, options);
    });
</script>

<div id="placeholder" style="height: 300px;"></div>
Home Page: http://flotcharts.org/
Documentation: https://github.com/flot/flot/blob/master/API.md
Plugin Location: /plugins/flot
FreeTile
Freetile is a plugin for jQuery that enables the organization of webpage content in an efficient, dynamic and responsive layout. It can be applied to a container element and it will attempt to arrange it's children in a layout that makes optimal use of screen space, by "packing" them in a tight arrangement.
This plugin is used in this template for the Image Gallery. This plugin can work together with the jQuery resize plugin, to listen to events when it's container resizes, the resize plugin is also included on the example below.
Usage Example
<script src="assets/jui/js/jquery-ui-1.8.24.min.js"></script>
<script src="plugins/freetile/jquery.freetile.min.js"></script>
<script src="plugins/freetile/jquery.resize.min.js"></script>

<script>
    $(document).ready(function() {
        if( $.fn.freetile ) {
            var f = $( '.gallery > ul' ).freetile({
                selector: 'li',
                animate: true,
            }).on( 'resize', function() {
                f.freetile( 'layout' );
            });
        }
    });
</script>

<div class="gallery">
    <ul>
        <li><!-- Gallery Content Here --></li>
    </ul>
</div>
Home Page: http://yconst.com/web/freetile/
Documentation: https://github.com/yconst/Freetile
Plugin Location: /plugins/freetile
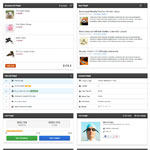
FullCalendar
FullCalendar is a jQuery plugin that provides a full-sized, drag & drop calendar like the one below. It uses AJAX to fetch events on-the-fly for each month and is easily configured to use your own feed format. It is visually customizable and exposes hooks for user-triggered events.
FullCalendar is great for displaying events, but it isn't a complete solution for event content-management. Beyond dragging an event to a different time/day, you cannot change an event's name or other associated data. It is up to you to add this functionality through FullCalendar's event hooks.
This plugin has its own container when put in a widget in this template, just put the calendar inside a div with the class .calendar as a widget content.
Usage Example
<link rel="stylesheet" href="plugins/fullcalendar/fullcalendar.css" media="screen">
<link rel="stylesheet" href="plugins/fullcalendar/fullcalendar.print.css" media="print">

<script src="assets/jui/js/jquery-ui-1.8.24.min.js"></script>
<script src="plugins/fullcalendar/fullcalendar.min.js"></script>

<script>
    $(document).ready(function() {
        if( $.fn.fullCalendar ) {
            var date = new Date();
            var d = date.getDate();
            var m = date.getMonth();
            var y = date.getFullYear();

            $( '#fullcalendar' ).fullCalendar({
                header: {
                    left: 'prev next today',
                    center: 'title',
                    right: 'month agendaWeek agendaDay'
                },
                editable: true,
                events: [
                    {
                        title: 'All Day Event',
                        start: new Date(Date.UTC(y, m, 1))
                    },

                    ...

                    {
                        title: 'Click for Google',
                        start: new Date(Date.UTC(y, m, 28)),
                        end: new Date(Date.UTC(y, m, 29)),
                        url: 'http://google.com/'
                    }
                ],

                buttonText: {
                    prev: '<i class="icon-caret-left"></i>',
                    next: '<i class="icon-caret-right"></i>',
                    prevYear: '<i class="icon-caret-left"></i><i class="icon-caret-left"></i>',
                    nextYear: '<i class="icon-caret-right"></i><i class="icon-caret-right"></i>'
                }
            });

        }
    });
</script>

<div id="fullcalendar"></div>
Home Page: http://arshaw.com/fullcalendar/
Documentation: http://arshaw.com/fullcalendar/docs/
Plugin Location: /plugins/fullcalendar
iButton
The iButton jQuery plug-in emulates the checkbox functionality found on the iPhone. This plug-in was inspired by several other plug-ins—such as Thomas Reynolds' iphone-style-checkboxes. However, this plug-in attempts to combine the best features of all of the various iPhone checkbox-style plug-ins and then add the functionality that we felt was still missing.
Note: The plugin shipped within this template is a modified version of the original plugin, so it may work without any images, and is styled using pure CSS3. Additionaly this plugin now supports HTML5 data-attributes, so you can create an iButton by just specifying data-provide="ibutton". This also provides you the ability to use those data-attributes to set the plugin options. The example code below only includes the required scripts and HTML markup and shows how those data-attributes functionality can help you create iButtons without writing any JavaScript code.
Usage Example
<link rel="stylesheet" href="plugins/ibutton/jquery.ibutton.css" media="screen">

<script src="assets/jui/js/jquery-ui-1.8.24.min.js"></script>
<script src="plugins/ibutton/jquery.ibutton.min.js"></script>

<div class="control-group">
    <label class="control-label">iOS CheckBoxes</label>
    <div class="controls">
        <label class="checkbox inline">
            <input type="checkbox" data-provide="ibutton">
        </label>
        <label class="checkbox inline">
            <input type="checkbox" data-provide="ibutton" disabled>
        </label>
        <label class="checkbox inline">
            <input type="checkbox" data-provide="ibutton" data-label-on="Like" data-label-off="Dislike" checked>
        </label>
        <label class="checkbox inline">
            <input type="checkbox" data-provide="ibutton" data-label-on="Yes, I'm in" data-label-off="No, I'm out">
        </label>
    </div>
</div>
Home Page: http://www.givainc.com/labs/ibutton_jquery_plugin.htm
Documentation: http://www.givainc.com/labs/ibutton_jquery_plugin.htm
Plugin Location: /plugins/ibutton
Map
The Google Map version 3 plugin for jQuery and jQM takes away some of the head aches from working with the Google Map API. Instead of having to use Google event listeners for simple events like click, you can use jQuery click events on the map and markers.
It is also very flexible, highly customizable, lightweight and works out of the box with jQuery mobile. But one of its best features is that you can populate a map from microformats, RDFa or microdata on your site, which can be used as a fallback when a user doesn't have javascript enabled.
Usage Example
<script src="assets/jui/js/jquery-ui-1.8.24.min.js"></script>
<script src="https://www.google.com/jsapi"></script>
<script src="http://maps.google.com/maps/api/js?sensor=true"></script>
<script src="plugins/map/jquery.ui.map.min.js"></script>
<script src="plugins/map/jquery.ui.map.services.min.js"></script>
<script src="plugins/map/jquery.ui.map.extensions.js"></script>

<script>
    $(document).ready(function() {
        if($.fn.gmap) {
            $('#gmap-canvas').gmap({
                'center': getLatLng(),
                zoom: 15
            });

            $( '#gmap-getpos' ).on('click', function(e) {
                // Try to get the user's position
                $('#gmap-canvas').gmap('getCurrentPosition', function(position, status) {
                        if ( status === 'OK' ) {
                            setPosition(position);
                        }
                });
                e.preventDefault();
            });

            function setPosition(position) {
                $('#gmap-canvas').gmap( 'option', 'center', position);
                $('#gmap-canvas').gmap( 'clear', 'markers');
                $('#gmap-canvas').gmap( 'addMarker', { bounds: true, position: position, 'animation': google.maps.Animation.DROP });
            }

            // Get the google loaders client location
            // If it fails, return some defult value
            function getLatLng() {
                    if ( google && google.loader && google.loader.ClientLocation != null )
                        return new google.maps.LatLng(google.loader.ClientLocation.latitude, google.loader.ClientLocation.longitude);
                    return new google.maps.LatLng( -6.175369, 106.827106 );
            }
        }
    });
    });
</script>

<div id="gmap-canvas" style="height: 400px;"></div>
The example above is the Google Map demo version of this template, to see it live please view the Widgets page.
Home Page: http://code.google.com/p/jquery-ui-map/
Documentation: http://code.google.com/p/jquery-ui-map/wiki/jquery_ui_map_v_3_api
Plugin Location: /plugins/map
MiniColors
jQuery MiniColors is a simple, compact color picker that complements a text or a hidden input control.
Usage Example
<script src="assets/jui/js/jquery-ui-1.8.24.min.js"></script>
<script src="plugins/minicolors/jquery.minicolors.min.js"></script>

<script>
    $(document).ready(function() {
        if( $.fn.miniColors ) {
            $( '.minicolors' ).miniColors();
        }
    });
</script>

<input type="text" class="minicolors">
Home Page: http://www.abeautifulsite.net/blog/2011/02/jquery-minicolors-a-color-selector-for-input-controls/
Documentation: https://github.com/claviska/jquery-miniColors
Plugin Location: /plugins/map
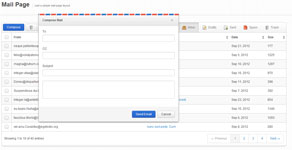
CodeCanyon MsgBox
This is the exclusive freebie from CodeCanyon shipped within this template. This great plugin was created by aeroalquimia on CodeCanyon and has been sold over 1260 times at this time.
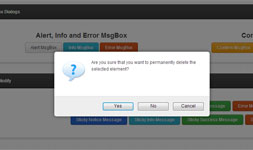
The author describes jQuery MsgBox as a jQuery plugin that is highly configurable to replace the basic functionality provided by the standard JavaScript alert(), confirm(), and prompt() functions.
Usage Example
<link rel="stylesheet" href="plugins/msgbox/jquery.msgbox.css" media="screen">

<script src="assets/jui/js/jquery-ui-1.8.24.min.js"></script>
<script src="plugins/msgbox/jquery.msgbox.min.js"></script>

<script>
    $(document).ready(function() {
        if( $.msgbox ) {

            $('button#msgbox').on( 'click', function(e) {
                $.msgbox("Are you sure that you want to permanently delete the selected element?", {
                    type: "confirm",
                    buttons : [
                        {type: "submit", value: "Yes"},
                        {type: "submit", value: "No"},
                        {type: "cancel", value: "Cancel"}
                    ]
                    }, function(result) {
                        $.msgbox( result );
                    }
                );

                e.preventDefault();
            });
        }
    });
</script>

<button class="btn" id="msgbox">
Home Page: http://codecanyon.net/item/jquery-msgbox/92626
Documentation: Click Here
Plugin Location: /plugins/msgbox
Pines Notify
Pines Notify is a JavaScript notification plugin, developed by Hunter Perrin as part of Pines. It is designed to provide an unparalleled level of flexibility, while still being very easy to implement and use.
This plugin does not need any external CSS stylesheet because it utilizes Bootstrap's alert component.
Usage Example
<script src="assets/jui/js/jquery-ui-1.8.24.min.js"></script>
<script src="plugins/pnotify/jquery.pnotify.min.js"></script>

<script>
    $(document).ready(function() {
        if( $.pnotify ) {

            $('button#pnotify').on( 'click', function(e) {
                $.pnotify({
                    title: 'Regular Notice',
                    text: 'Check me out! I\'m a notice.'
                });

                e.preventDefault();
            });
        }
    });
</script>

<button class="btn" id="pnotify">
Home Page: http://pinesframework.org/pnotify/
Documentation: http://pinesframework.org/pnotify/
Plugin Location: /plugins/pnotify
Google Prettify
Google Prettify is a Javascript module and CSS file that allows syntax highlighting of source code snippets in an HTML page. The code examples in this documentation all are styled using this script. This script allows you to make your own themes, and it's very easy to use.
The code example and the whole documentation uses a theme named Balupton, which is actually a part of an another syntax highlighting plugin that utilizes Google Prettify. I choose the original Google Prettify because of it's simplicity and ease of use.
Usage Example
<link rel="stylesheet" href="plugins/prettify/themes/theme-balupton.css">

<script src="assets/jui/js/jquery-ui-1.8.24.min.js"></script>
<script src="plugins/prettify/prettify.js"></script>

<script>
    $(document).ready(function() {
        if( window.prettify ) {
            prettify();
        }
    });
</script>
Home Page: https://code.google.com/p/google-code-prettify/
Documentation: http://google-code-prettify.googlecode.com/svn/trunk/README.html
Plugin Location: /plugins/prettify
jQuery Star Rating
The Star Rating Plugin is a plugin for the jQuery Javascript library that creates a non-obstrusive star rating control based on a set of radio input boxes.
This plugin's default functionality is very easy to use. Just add the .star class to your radio boxes, and you're done.
Usage Example
<link rel="stylesheet" href="plugins/rating/jquery.rating.css" media="screen">

<script src="assets/jui/js/jquery-ui-1.8.24.min.js"></script>
<script src="plugins/rating/jquery.rating.min.js"></script>

<input name="star1" type="radio" class="star"/>
<input name="star1" type="radio" class="star"/>
<input name="star1" type="radio" class="star"/>
<input name="star1" type="radio" class="star"/>
<input name="star1" type="radio" class="star"/>
Home Page: http://www.fyneworks.com/jquery/star-rating/
Documentation: http://www.fyneworks.com/jquery/star-rating/#tab-API
Plugin Location: /plugins/rating
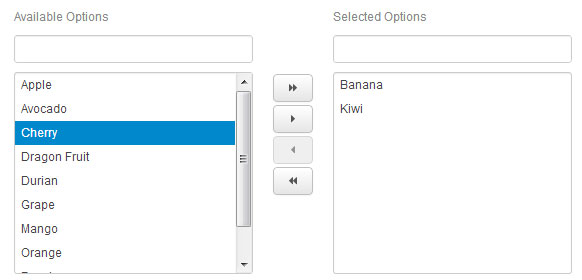
Select2
Select2 is a jQuery based replacement for select boxes. It supports searching, remote data sets, and infinite scrolling of results. Look and feel of Select2 is based on the excellent Chosen library.
Usage Example
<link rel="stylesheet" href="plugins/select2/select2.css" media="screen">

<script src="assets/jui/js/jquery-ui-1.8.24.min.js"></script>
<script src="plugins/select2/select2.min.js"></script>

<script>
    $(document).ready(function() {
        if( $.fn.select2 ) {
            $('#e1').select2();
        }
    });
</script>

<select id="e1">
    <option value="AL">Alabama</option>
    ...
    <option value="WY">Wyoming</option>
</select>
Home Page: http://ivaynberg.github.com/select2/
Documentation: http://ivaynberg.github.com/select2/
Plugin Location: /plugins/select2
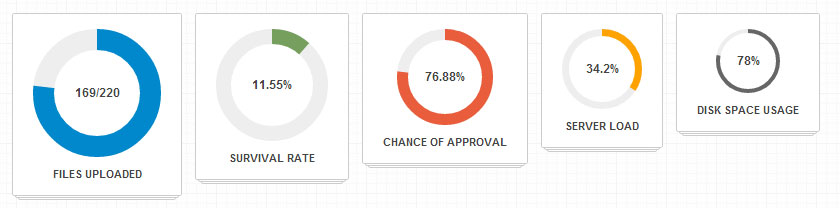
jQuery Sparklines
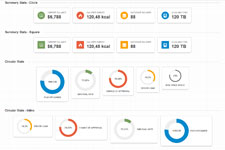
Sparklines is a jQuery plugin that generates sparklines (small inline charts) directly in the browser using data supplied either inline in the HTML, or via JavaScript.
Usage Example
<script src="assets/jui/js/jquery-ui-1.8.24.min.js"></script>
<!--[if lt IE 9]>
<script src="assets/js/libs/excanvas.min.js"></script>
<![endif]-->
<script src="plugins/sparkline/jquery.sparkline.min.js"></script>

<script>
    $(document).ready(function() {
        /* Inline sparklines take their values from the contents of the tag */
        $('.inlinesparkline').sparkline();

        /* Sparklines can also take their values from the first argument
        passed to the sparkline() function */
        var myvalues = [10,8,5,7,4,4,1];
        $('.dynamicsparkline').sparkline(myvalues);

        /* The second argument gives options such as chart type */
        $('.dynamicbar').sparkline(myvalues, {type: 'bar', barColor: 'green'} );

        /* Use 'html' instead of an array of values to pass options
        to a sparkline with data in the tag */
        $('.inlinebar').sparkline('html', {type: 'bar', barColor: 'red'} );
    });
</script>

<p>Inline Sparkline: <span class="inlinesparkline">1,4,4,7,5,9,10</span><p>
<p>Sparkline with dynamic data: <span class="dynamicsparkline">Loading..</span><p>
<p>Bar chart with dynamic data: <span class="dynamicbar">Loading..</span><p>
<p>Bar chart with inline data: <span class="inlinebar">1,3,4,5,3,5</span><p>
Home Page: http://omnipotent.net/jquery.sparkline/
Documentation: http://omnipotent.net/jquery.sparkline/
Plugin Location: /plugins/sparkline
Tweet!
Tweet! is a plugin to put twitter on your website, which is an unobtrusive JavaScript plugin for jQuery.
A more advanced example usage of this plugin can be found on the Widgets page of this template, or on their home page.
Usage Example
<script src="assets/jui/js/jquery-ui-1.8.24.min.js"></script>
<script src="plugins/tweet/jquery.tweet.min.js"></script>

<script>
    $(document).ready(function() {
        if( $.fn.tweet ) {
            $(".tweets").tweet({
              join_text: "auto",
              username: "nagaemas_tf",
              avatar_size: 48,
              count: 3
            });
        }
    });
</script>

<div class="tweets"></div>
Home Page: http://tweet.seaofclouds.com/
Documentation: http://tweet.seaofclouds.com/
Plugin Location: /plugins/tweet
Uniform
Uniform is a plugin that masks your standard form controls with custom themed controls. It works in sync with your real form elements to ensure accessibility and compatibility.
Usage of uniform on this template is by default already supported for the whole template, but is by default limited to only radio and checkbox inputs, as I think it's really unneeded to style other inputs with images. To use this plugin directly, you only need to include Uniform's JavaScript and CSS files, give the radio and checkbox inputs you want to style the class .uniform as styling every checkbox and radio buttons might cause conflicts with other plugins.
Remember! The plugin is initiated in the /assets/js/setup.js file, so don't forget to add this script on your page if you want to make it work directly without writing any JavaScript code.
Usage Example
<link rel="stylesheet" href="plugins/uniform/css/uniform.default.css">

<script src="assets/jui/js/jquery-ui-1.8.24.min.js"></script>
<script src="plugins/uniform/jquery.uniform.min.js"></script>

<script>
    $(document).ready(function() {
        if( $.fn.uniform ) {
            $( 'input:checkbox, input:radio' ).uniform();
        }
    });
</script>
Home Page: http://uniformjs.com/
Documentation: http://uniformjs.com/
Plugin Location: /plugins/uniform
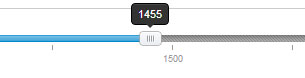
jQuery Validate Plugin
This jQuery plugin makes simple clientside form validation trivial, while offering lots of option for customization. That makes a good choice if you’re building something new from scratch, but also when you’re trying to integrate it into an existing application with lots of existing markup. The plugin comes bundled with a useful set of validation methods, including URL and email validation, while providing an API to write your own methods. All bundled methods come with default error messages in english and translations into 36 locales.
Usage Example
There is no usage example for this plugin as the plugin itself is very flexible, so you need to customize the plugin to suit your needs. Below I'll just provide you the required steps to make this plugin work with your forms,
- As usual, include jQuery, and the jQuery validation plugin
- Create your form along with all inputs you need
- This is an important step, add for each input you want to validate a
name attribute as this is required for this plugin to work correctly. If you want to define your validation rules inline, add the following predefined classes to your inputs.
- Then call validate on your form!
Home Page: http://bassistance.de/jquery-plugins/jquery-plugin-validation/
Documentation: http://docs.jquery.com/Plugins/Validation
Plugin Location: /plugins/validate